SQL Azure CRUD operations with Azure Functions
05 Jun 2017In this article I will show you how to do database operations with Azure Function.
Scenario
We have Azure Function that performs an important task for us. This Azure Function is called by several applications. Every time we call the Azure Function, we want to insert a record to log table.
What We Need?
- Azure SQL DB
- Azure Function App
Azure SQL DB
First we need to configure the database to insert data with Azure Function.
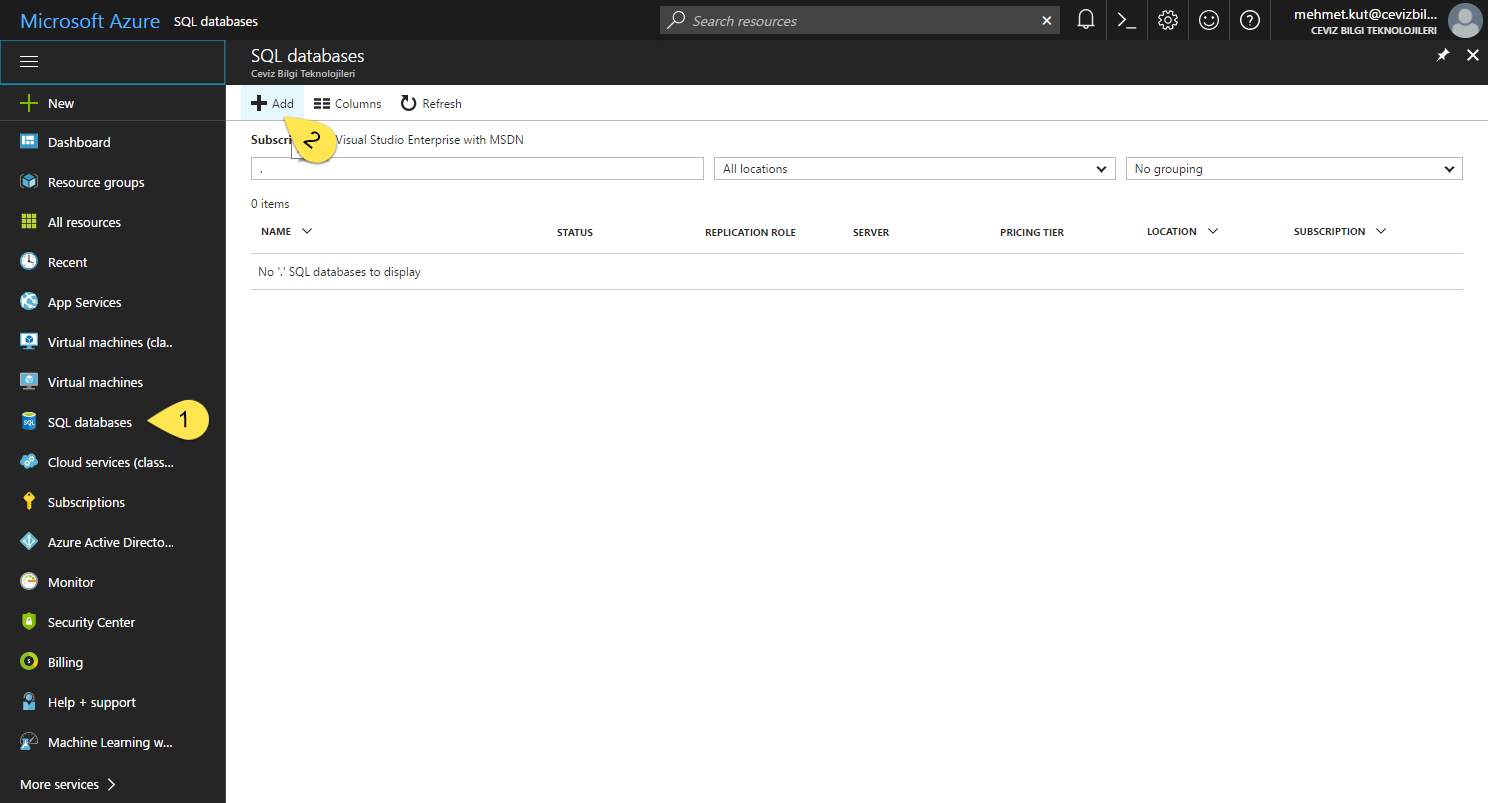
- Select SQL Databases from left menu.
- On this blade, Click on the Add button.
-
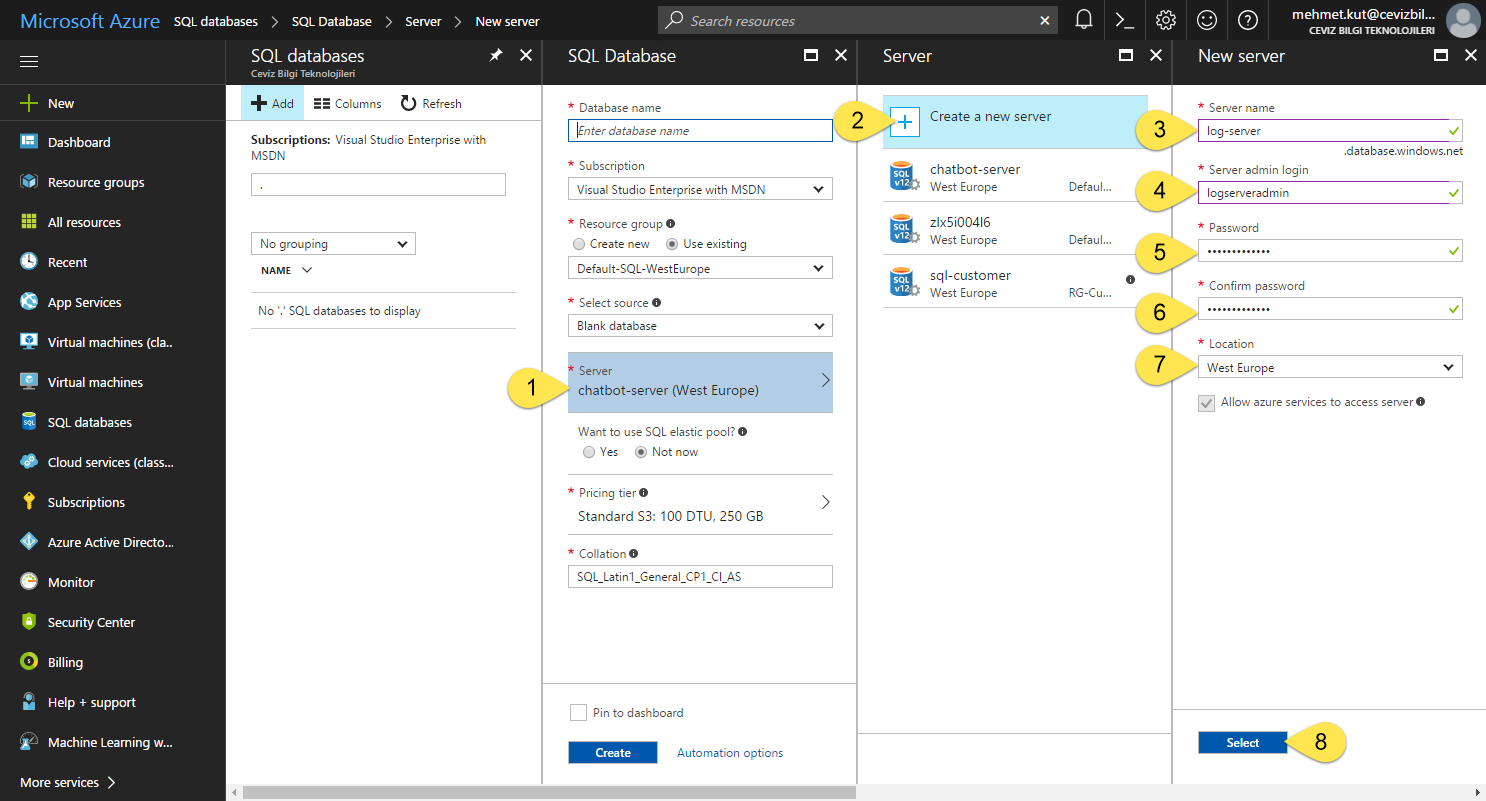
To start, we are creating a new Server. If you have configured a Server here before, you can choose from available ones. you will need the username and password to connect to the server you selected.
-
Create a new server, we are starting to create a new server.
-
Type server name in Server name field
-
Server admin login, this will be username. We will use to connect to our server
-
Password, this will be password. We will use to connect to our server
-
Confim password, again for confirm password.
-
Location, select nearest Azure location. From my location West Europe data center is nearest. This will be change depends on your location.
-
Click on Select button and our Azure DB Server is ready. 👍
-
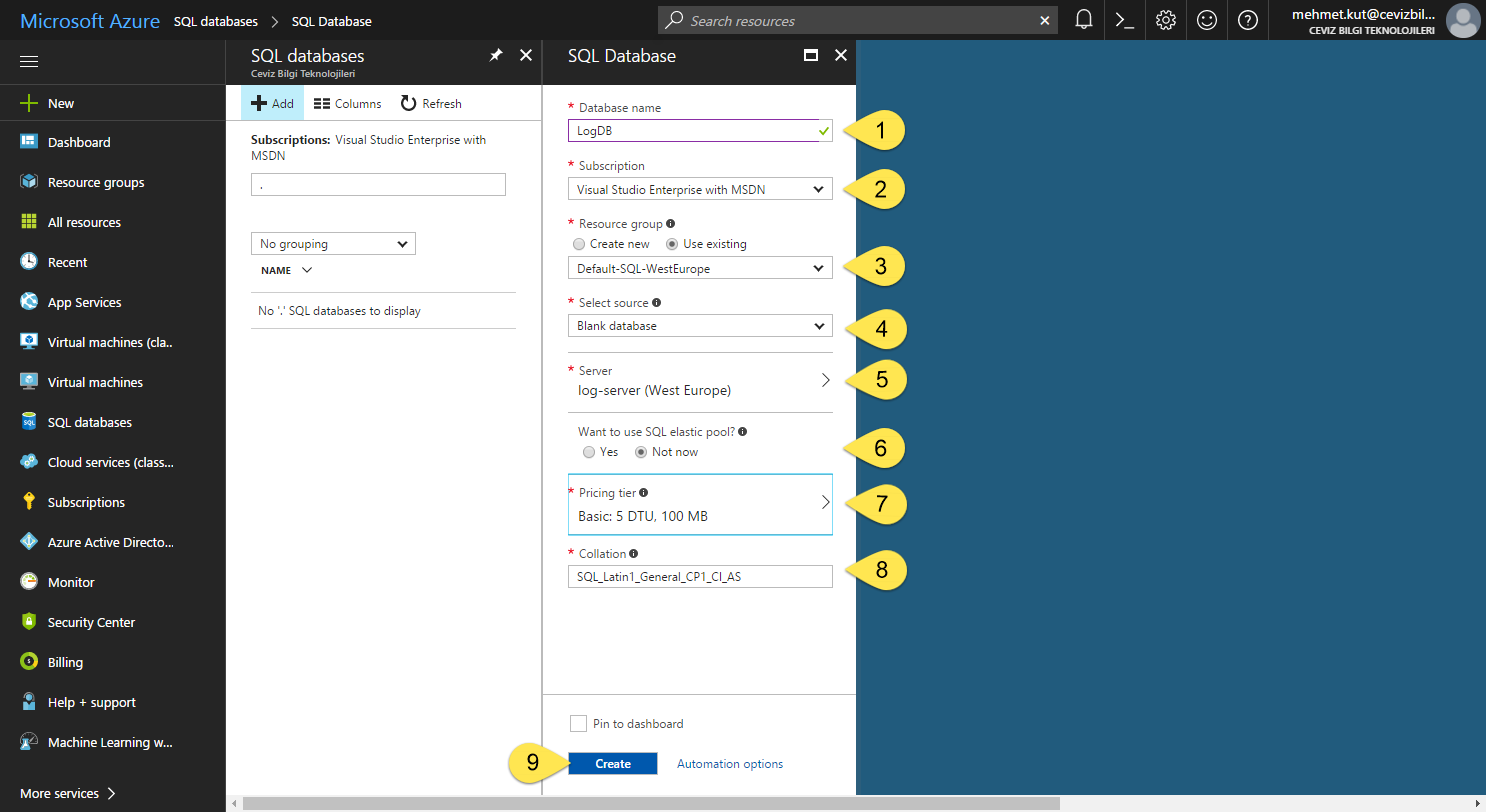
Database name, The database name we will insert our logs. I typed it as LogDB.
-
Subscription, Choose your Azure Subscription.
-
Resource Group, Select the resource group to be used. I chose a resource group that I had previously configured at WestEurope location. If you don’t have a previously defined resource group, you can create a new resource group by pressing Create new.
Select nearest Azure location.
-
Select source, select Blank database because we want an empty database.
-
Server, We have set up the server in the previous steps.
-
Want to use SQL elastic pool?, For now, we can select “Not now”
-
Pricing tier, I selected Basic: 5 DTU, 100MB because I would not use it at real scenario.
-
Collation, Leave as SQL_Latin1_General_CP1_CI_AS
-
Click on Create, button to create our database.
-
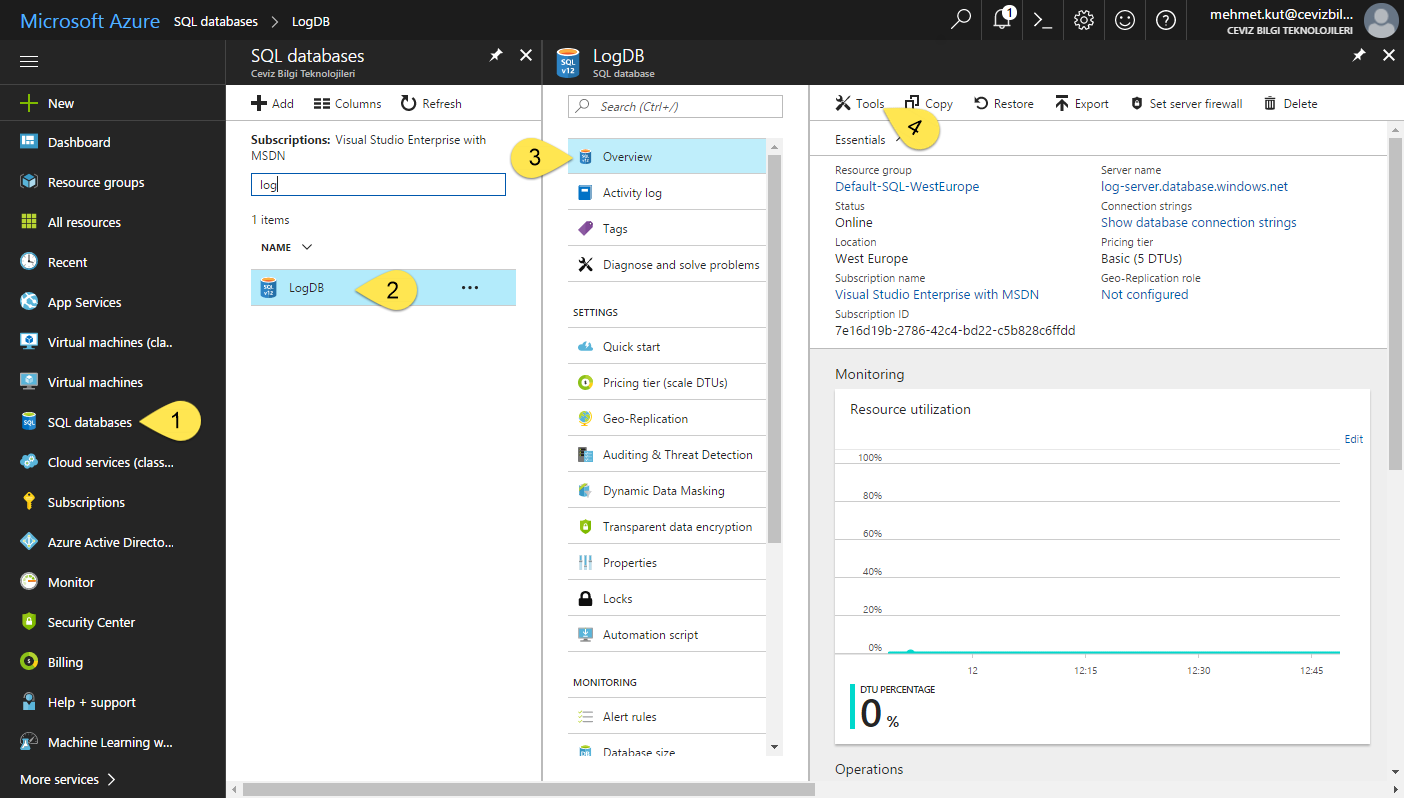
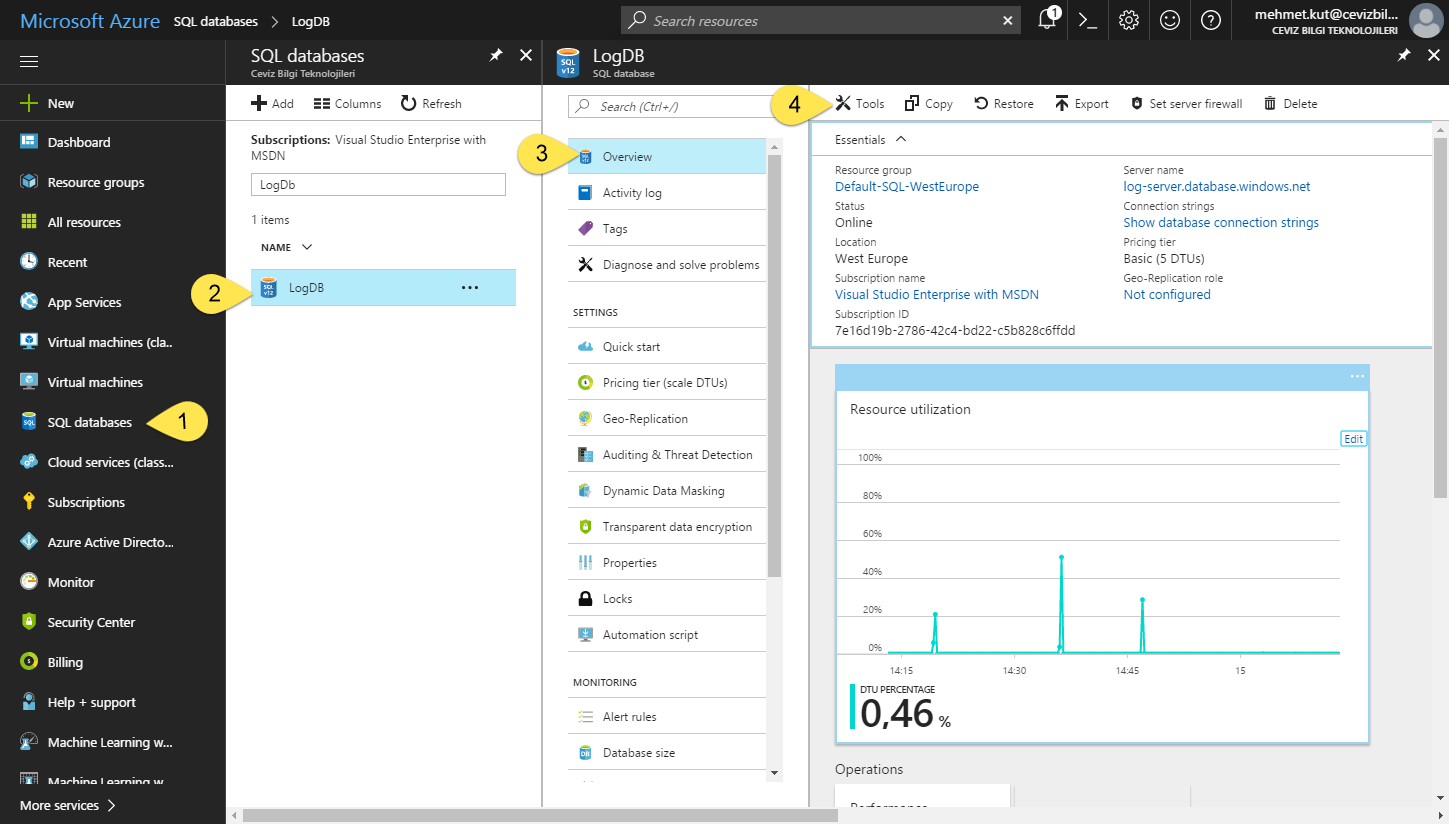
To work on the database we created, we click on SQL databases from the left menu.
-
Click on LogDB
-
Click on Overview
-
Finally Click on Tools button.
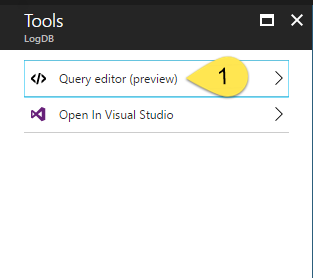
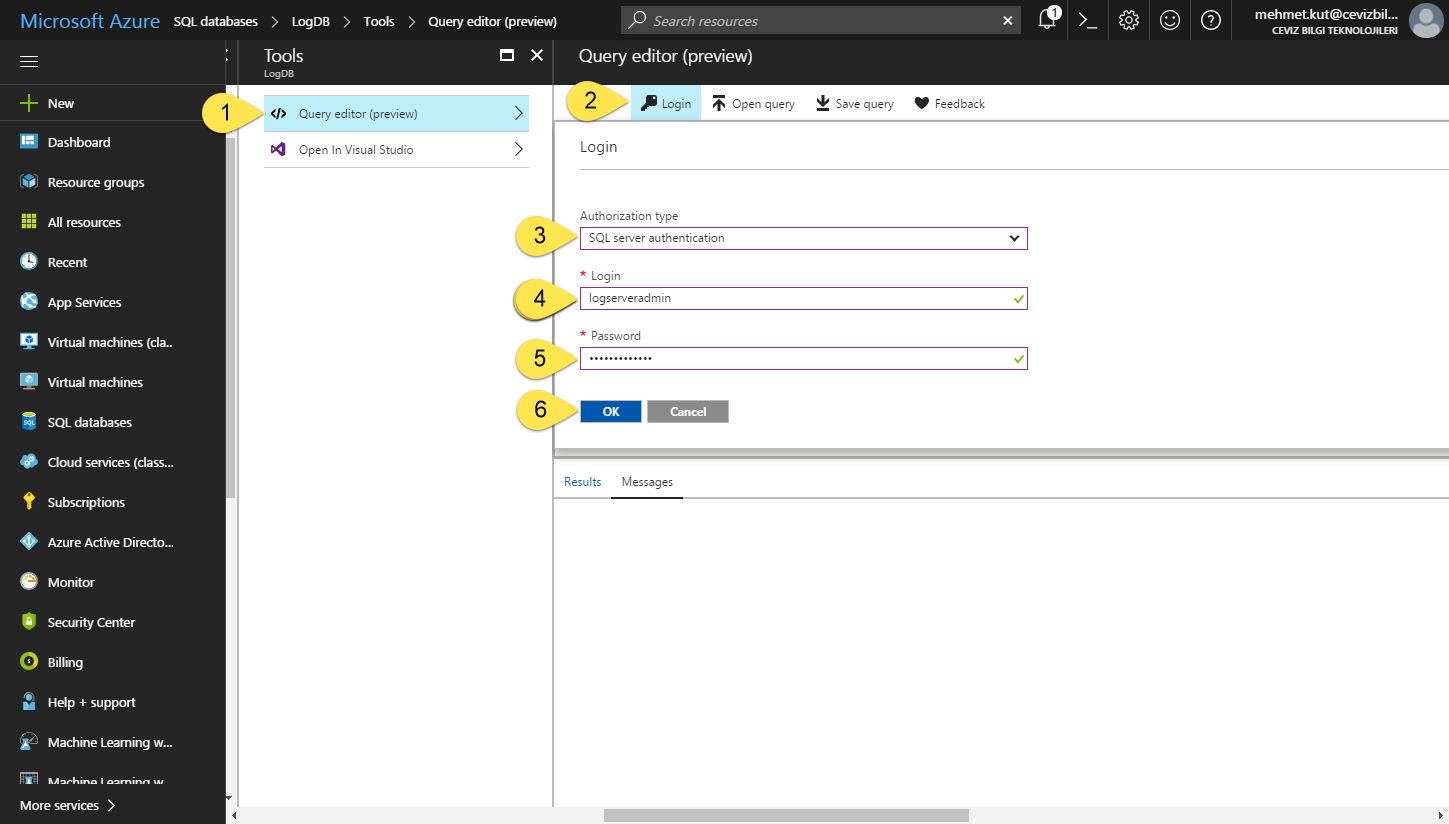
1.There are actually a several options to connect to the database, such as Visual Studio or SQL Server Management Studio. However, I will select the Query editor which is currently in preview stage. So I will be able to continue to work without leaving the Azure Portal. In this blade, click on Query editor and continue.
-
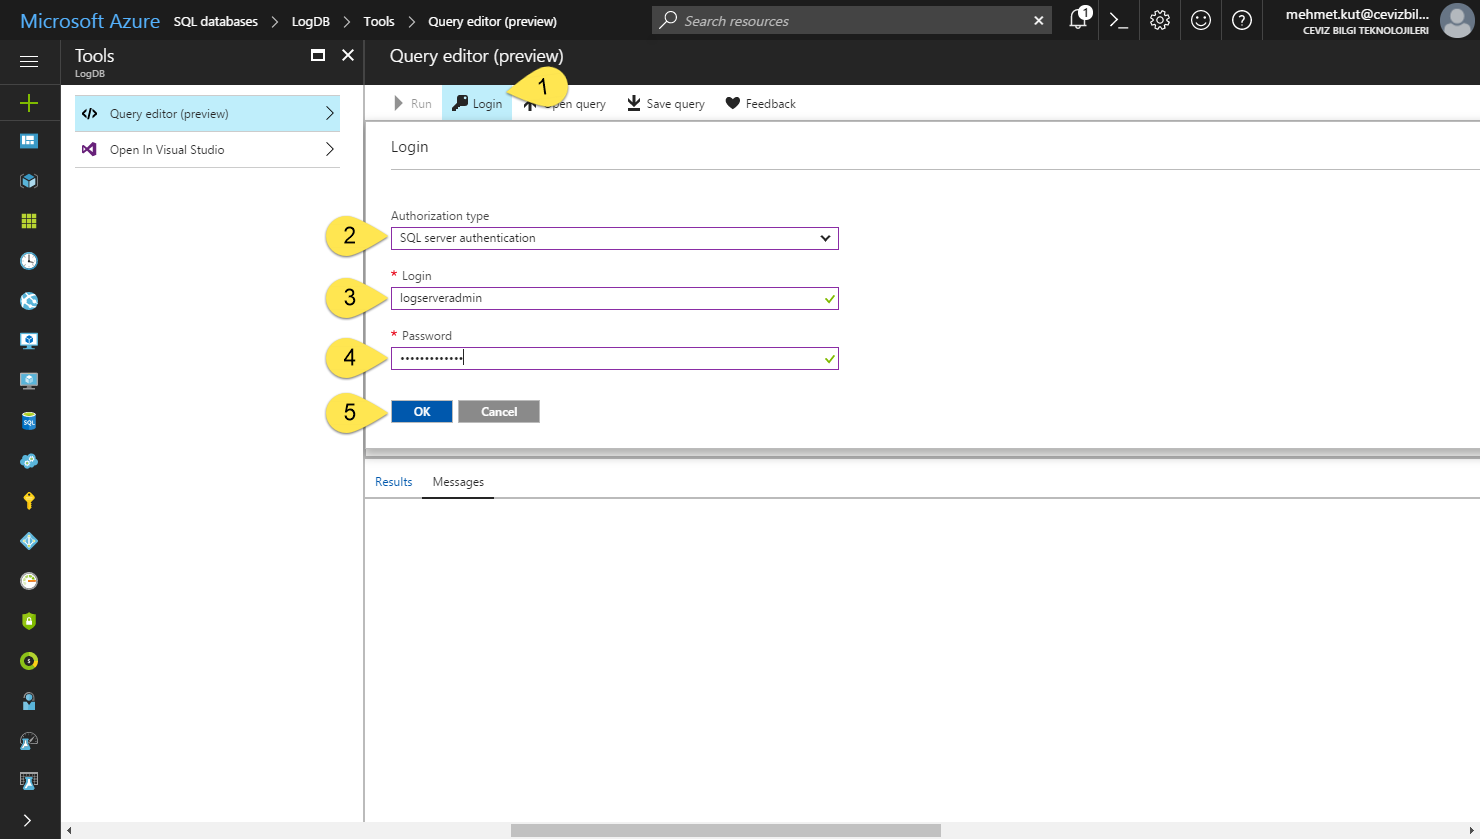
Click Login button.
-
Choose SQL server authentication as Authorization type.
-
Login type the username that we defined while creating the SQL server.
-
Password type the password that we defined while creating the SQL server.
-
Click on OK, button and connect to server.
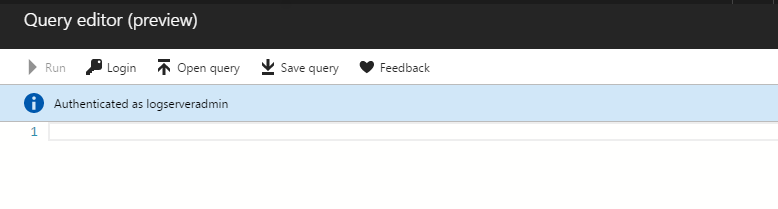
If everything goes well, you should see Authenticated as your_user_name as in the screenshot above.
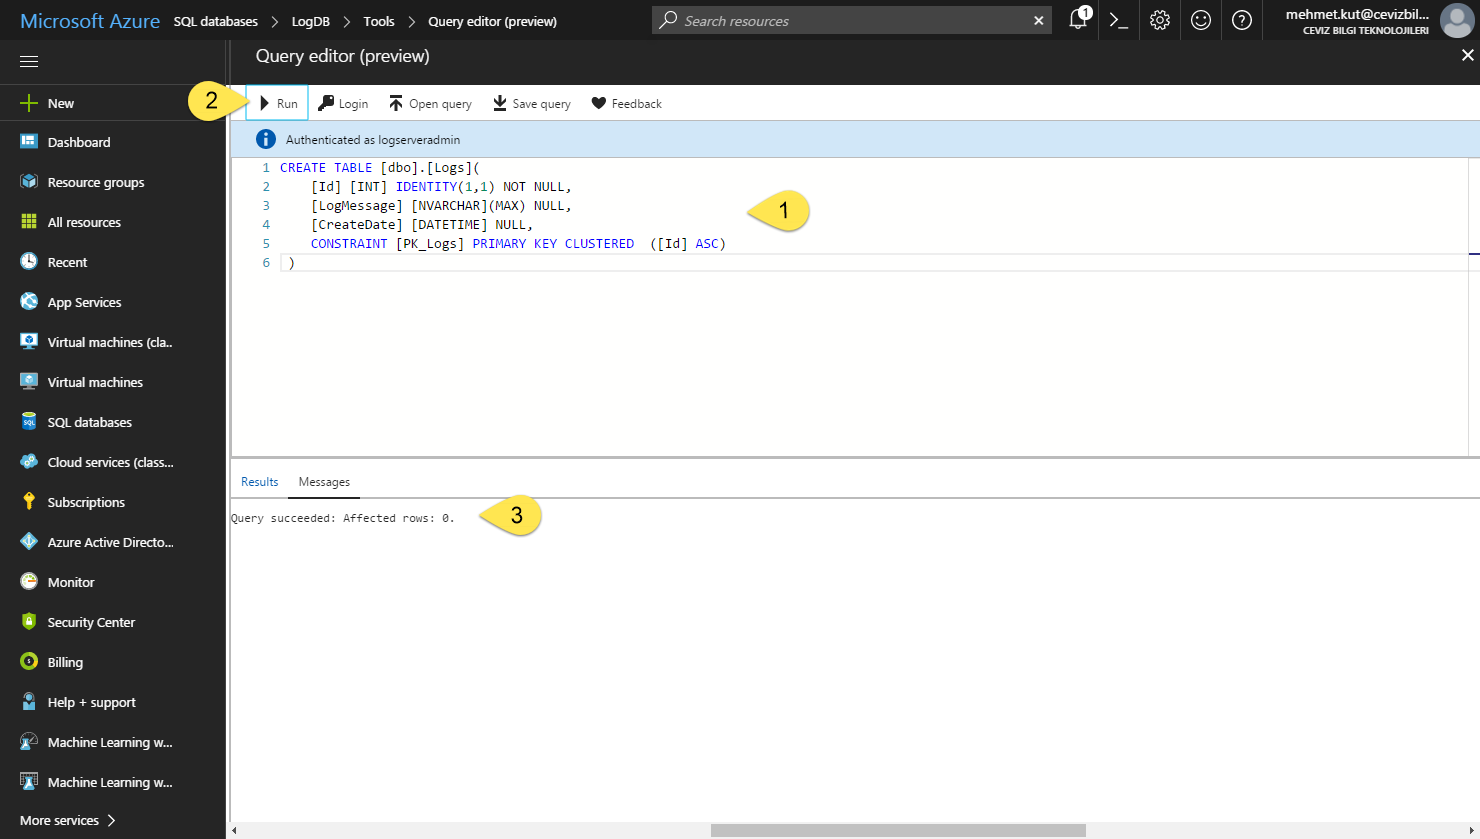
- W ewill create a our log table.
Columns.
Id Primary Key field.
LogMessage we store log message in this column.
CreateDate log create date.
CREATE TABLE [dbo].[Logs](
	[Id] [INT] IDENTITY(1,1) NOT NULL,
	[LogMessage] [NVARCHAR](MAX) NULL,
	[CreateDate] [DATETIME] NULL,
    CONSTRAINT [PK_Logs] PRIMARY KEY CLUSTERED  ([Id] ASC)
 )
-
Click on Run button to run our code.
-
On the Messages tab, if you see Query succeed, our code worked successfully.
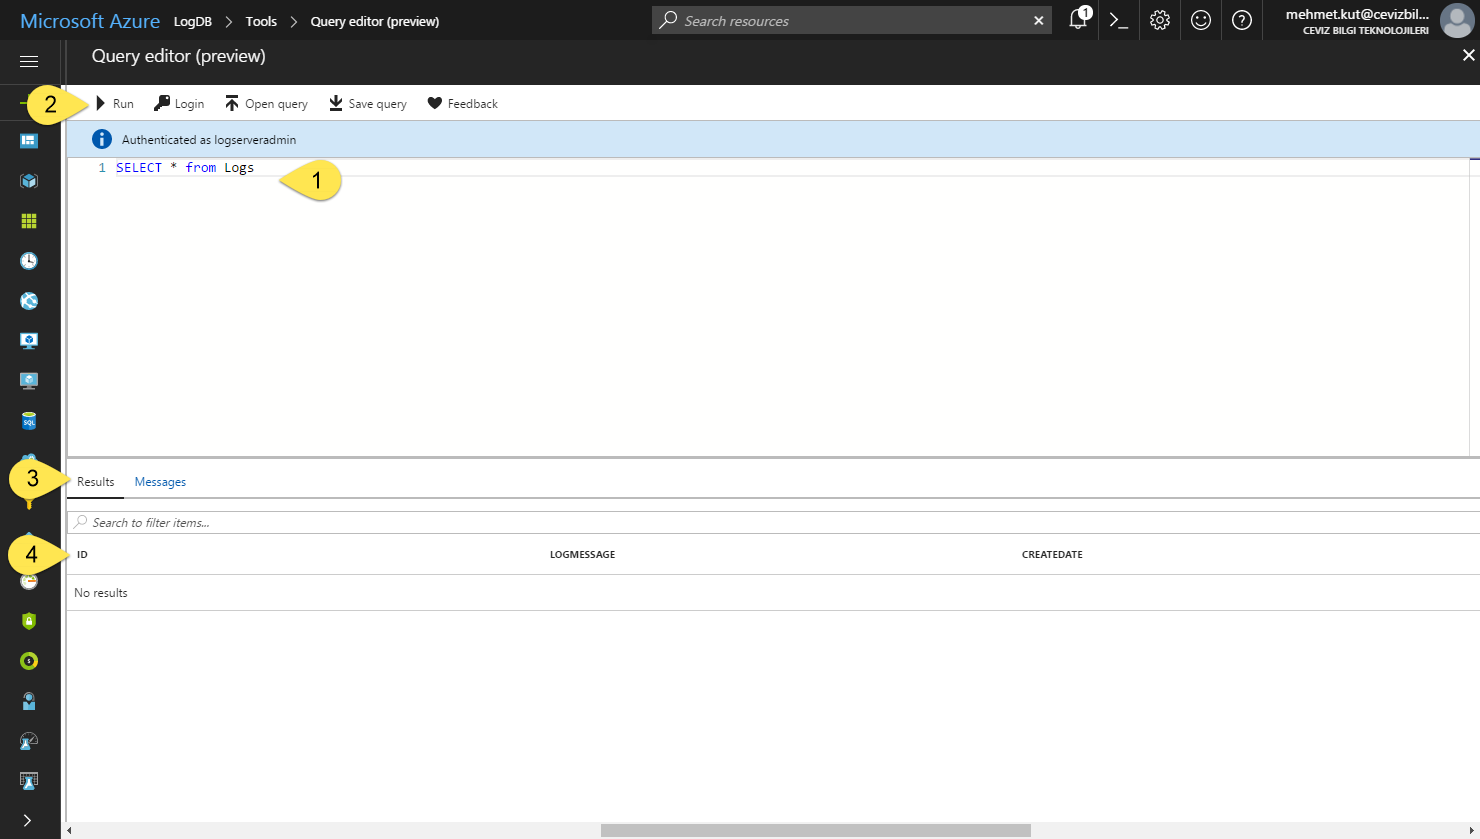
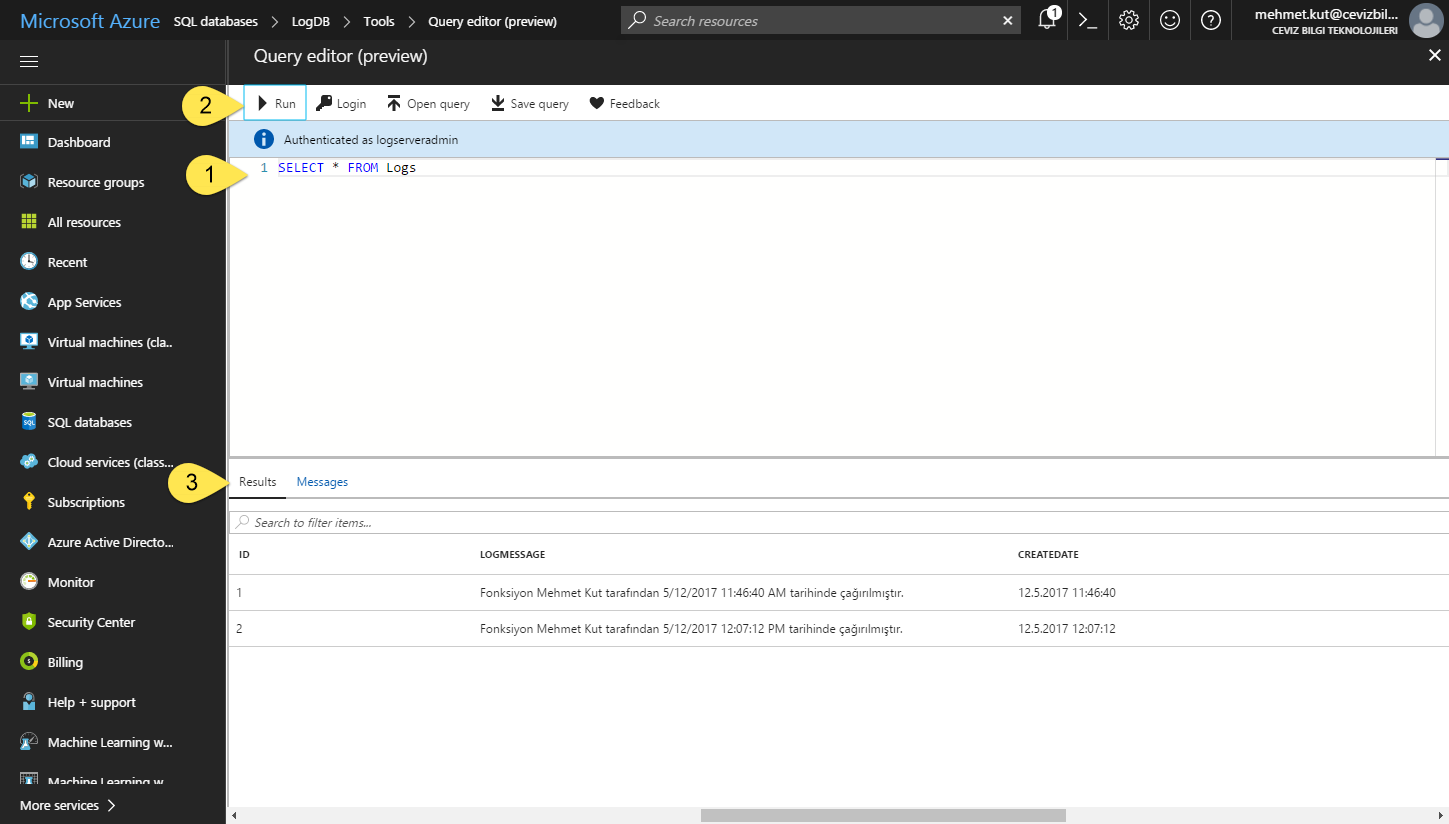
- To see if your table is created, we type our select query in the query editor.
SELECT * FROM Logs
-
Click on Run button to run code.
-
Click on Result tab.
-
As we have seen, our columns appear on screen. No results because there is no dat in log table yet.
Our database is ready with this step. 👍
Azure Function App
We are configuring our Azure Function App service using the Azure Portal.
-
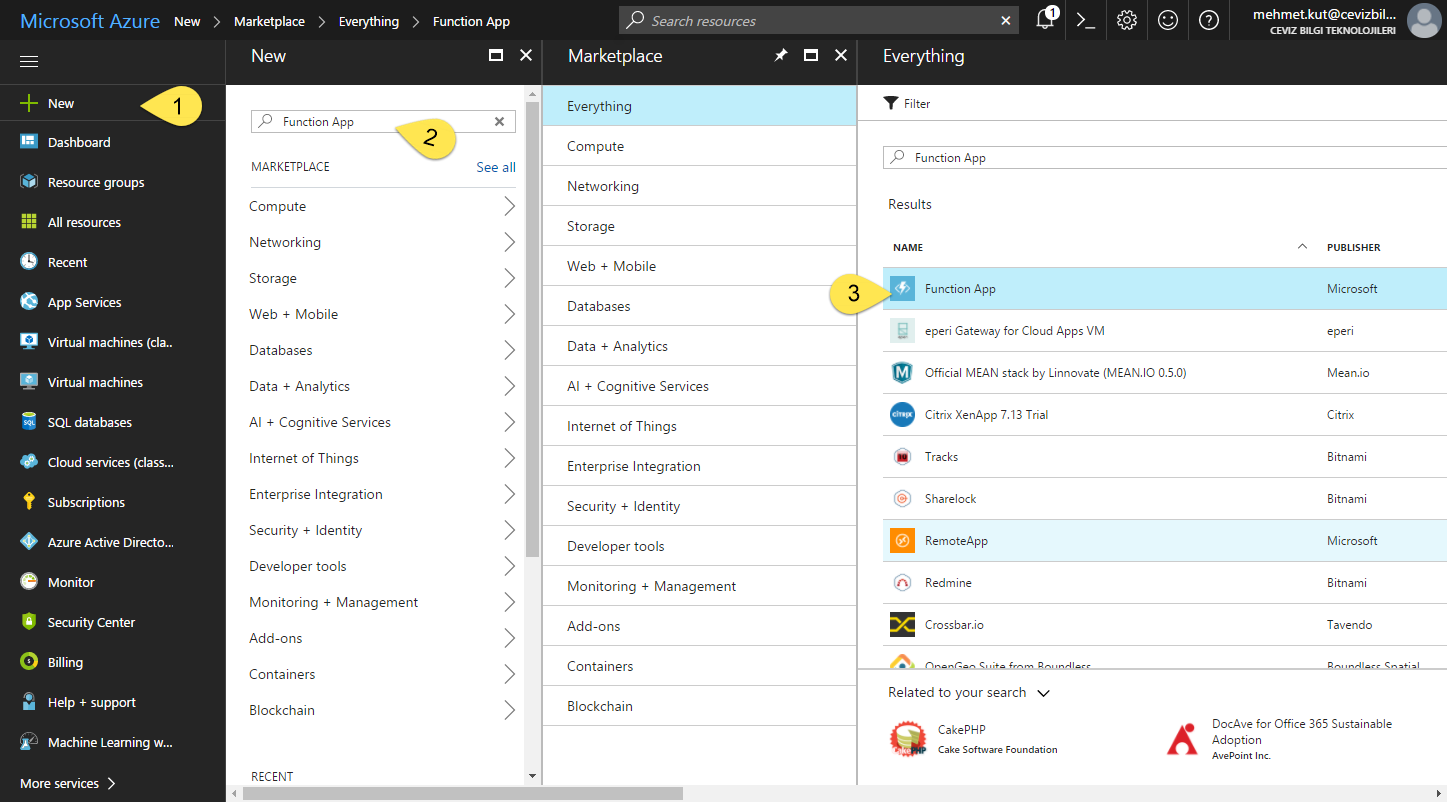
Click on New from left menu.
-
Type Function App in search field.
-
Click on Function App item.
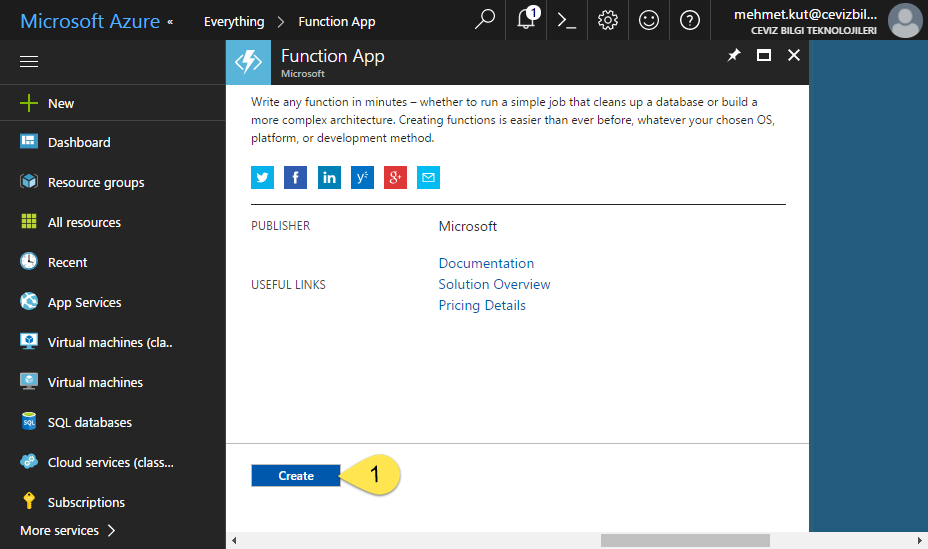
- Click the Create button on the Function App to start creating the Function App.
-
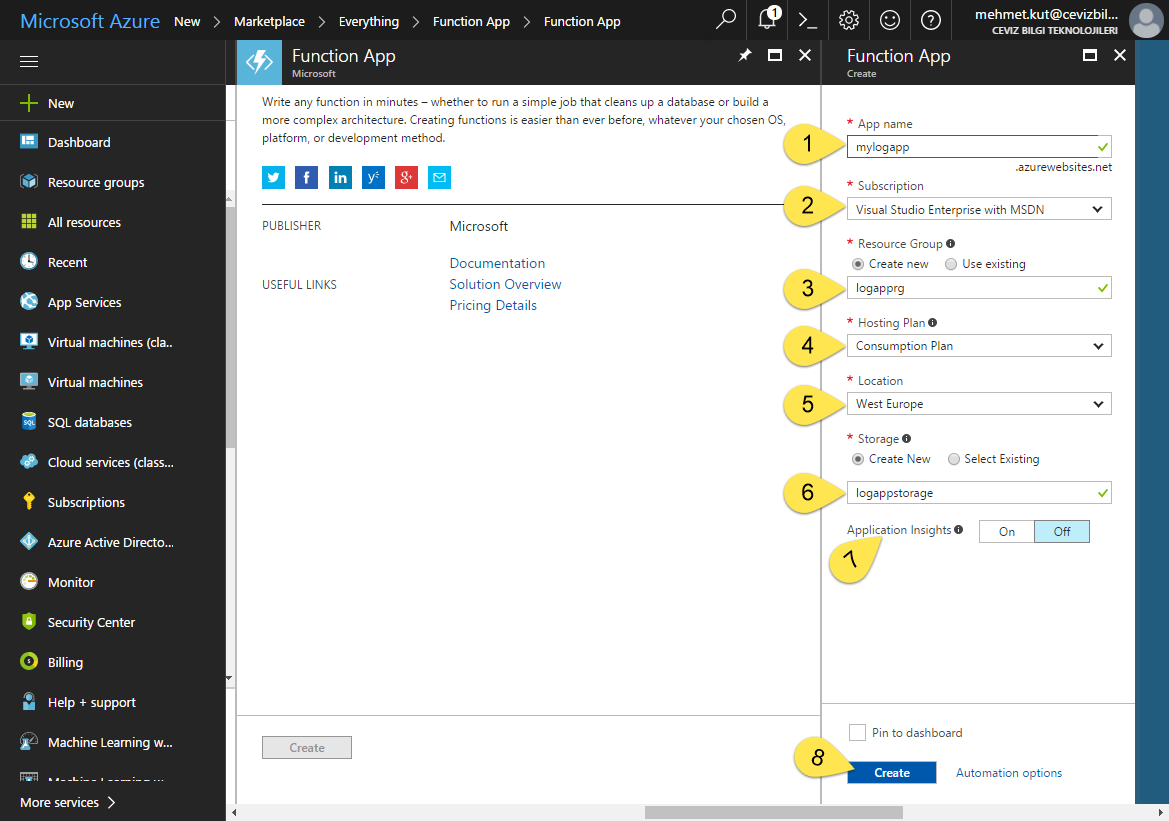
App name, name of our application.
-
Subscription, Select Azure Subscription.
-
Resource Group, Select the resource group to be used. I chose a resource group that I had previously configured at WestEurope location. If you don’t have a previously defined resource group, you can create a new resource group by pressing Create new.
-
Hosting Plan, here you can select to Consumption Plan.
-
Location, select nearest Azure location. From my location West Europe data center is nearest. This will be change depends on your location.
-
Storage, You can create a new storage or choose from the available ones.
-
Application Insights, You can leave Off for now.
-
Click on Create button to create Function App service.
Open the Function App we have created.
-
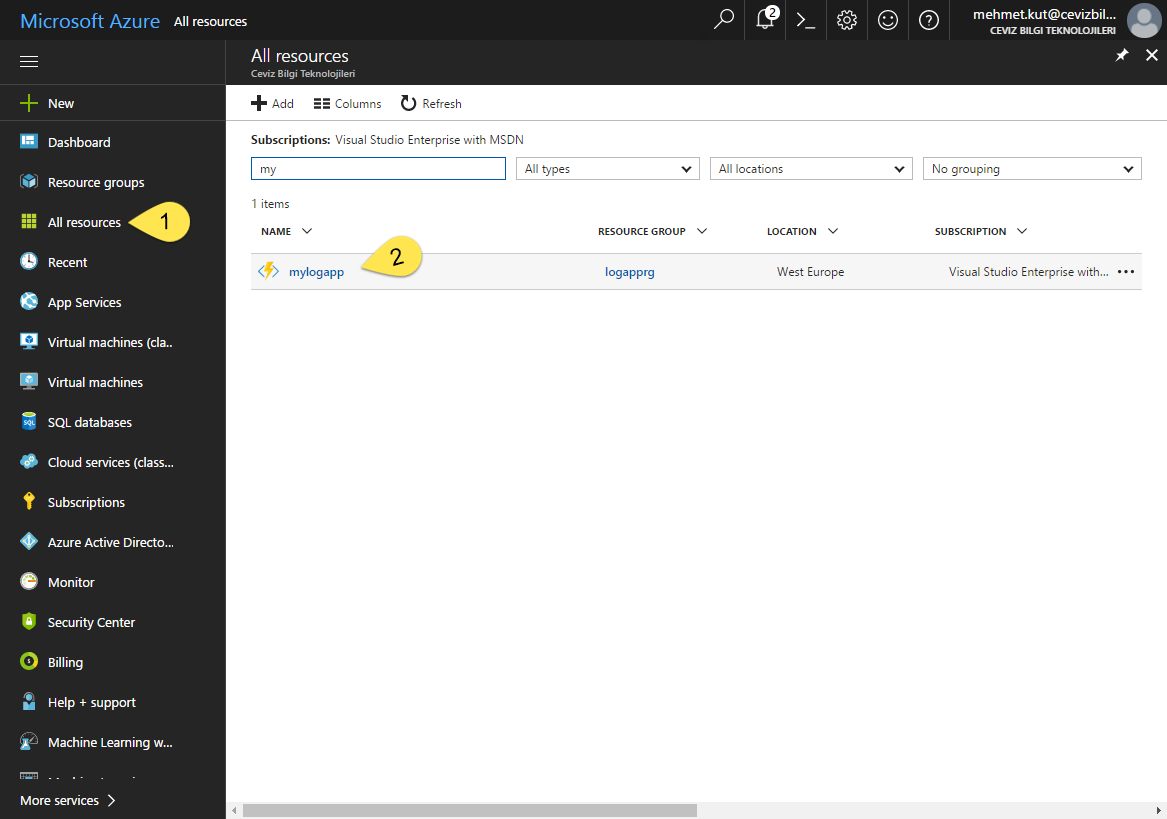
Click on All resources from left menu.
-
Find the App name and click on it.
If there are lot of resource you can filter.
Function App screen will look like this:
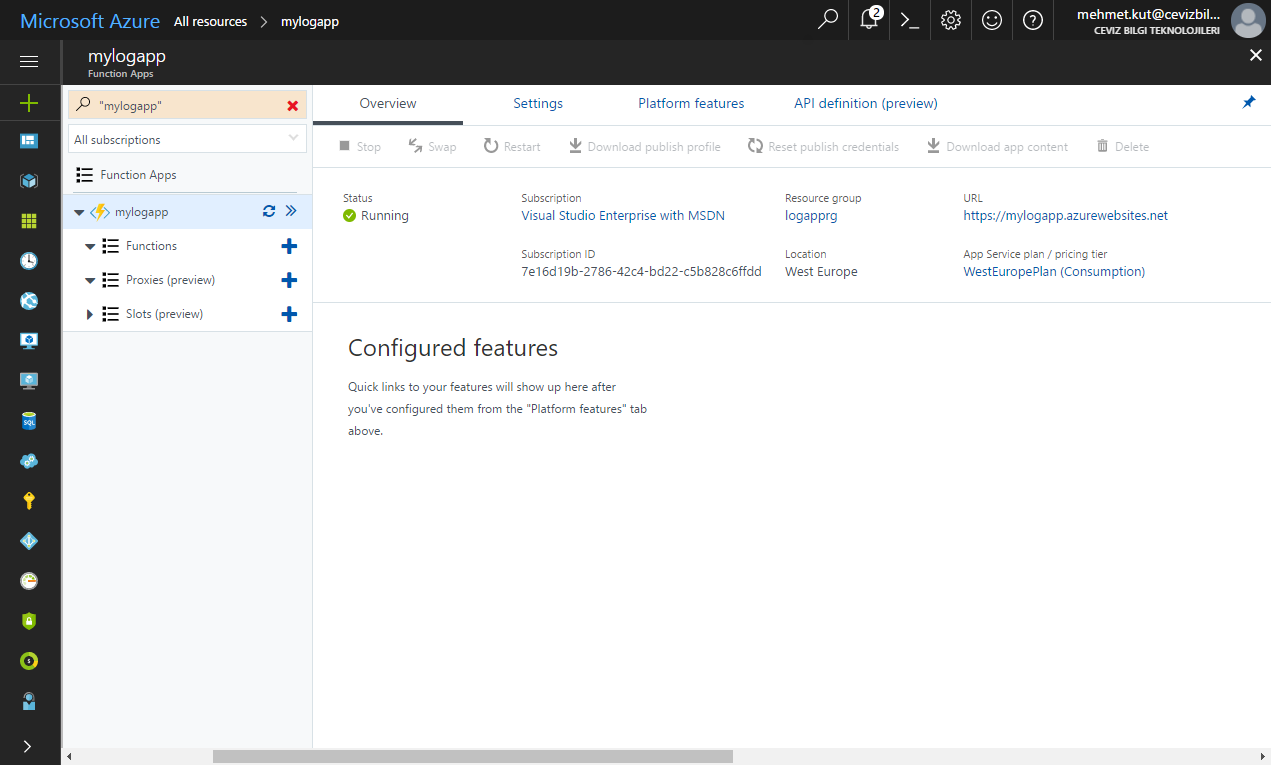
Function App status Running ✅
Now, we are ready to create a new Azure Function.😄
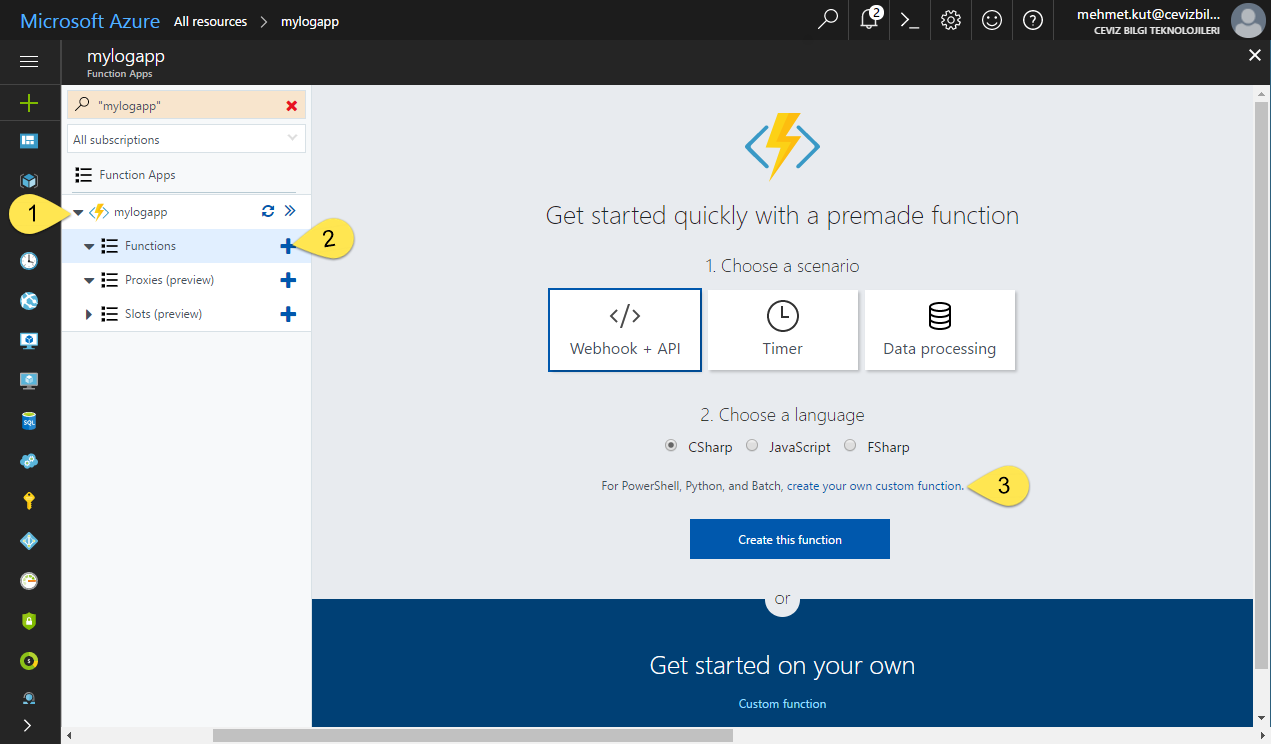
-
Here we expand the arrow mark next to mylogapp.
-
Click on + icon.
-
Click on create your own custom function. link.
Actually, you can click here Webhook + API, CSharp and Create this function button. However, the name of our function will be given automatically. We have not yet been able to rename the function on the portal so do it like step 3.
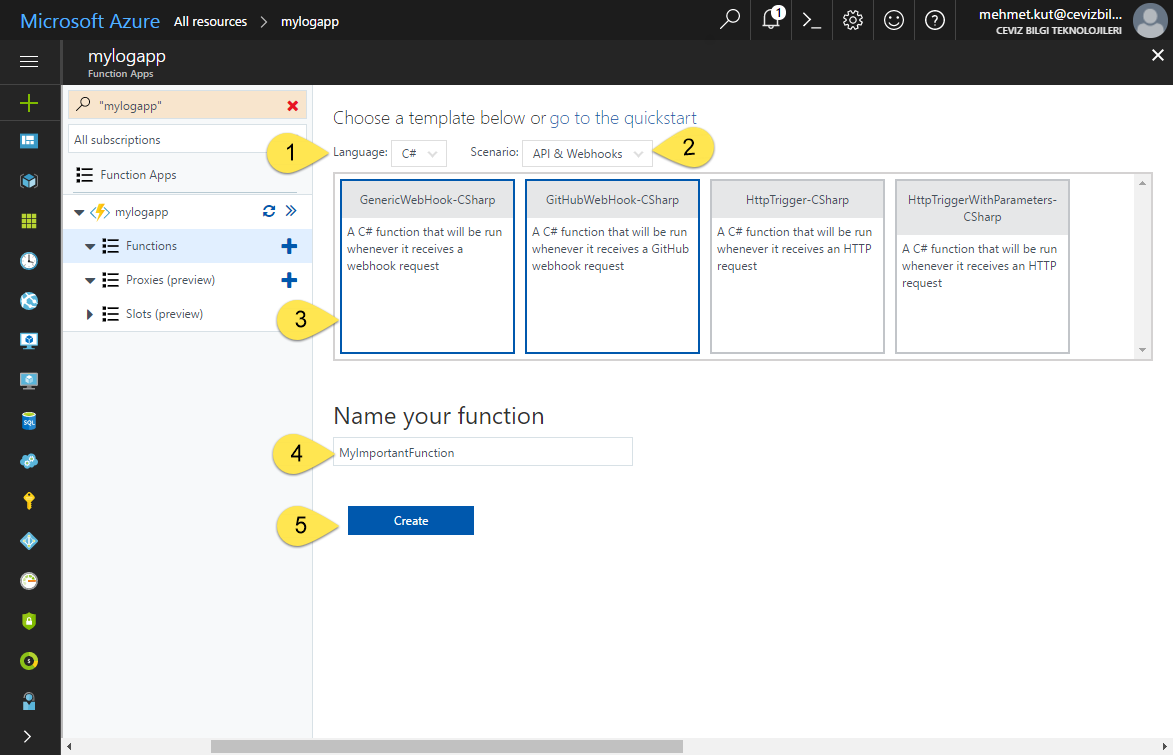
-
Language select C # as the language.
-
Scenario Big thanks to Function Apps team for this feature. We have logical groups.
-
GenericWebHook-CSharp this is most suitable scenario right now.
-
Here we give the name of our function. As I mentioned earlier, it is difficult to change the function name later. Give it carrefully. I typed it as MyImportantFunction. I told you before it is important function. 😄
-
Click on Create button to create our fuction.
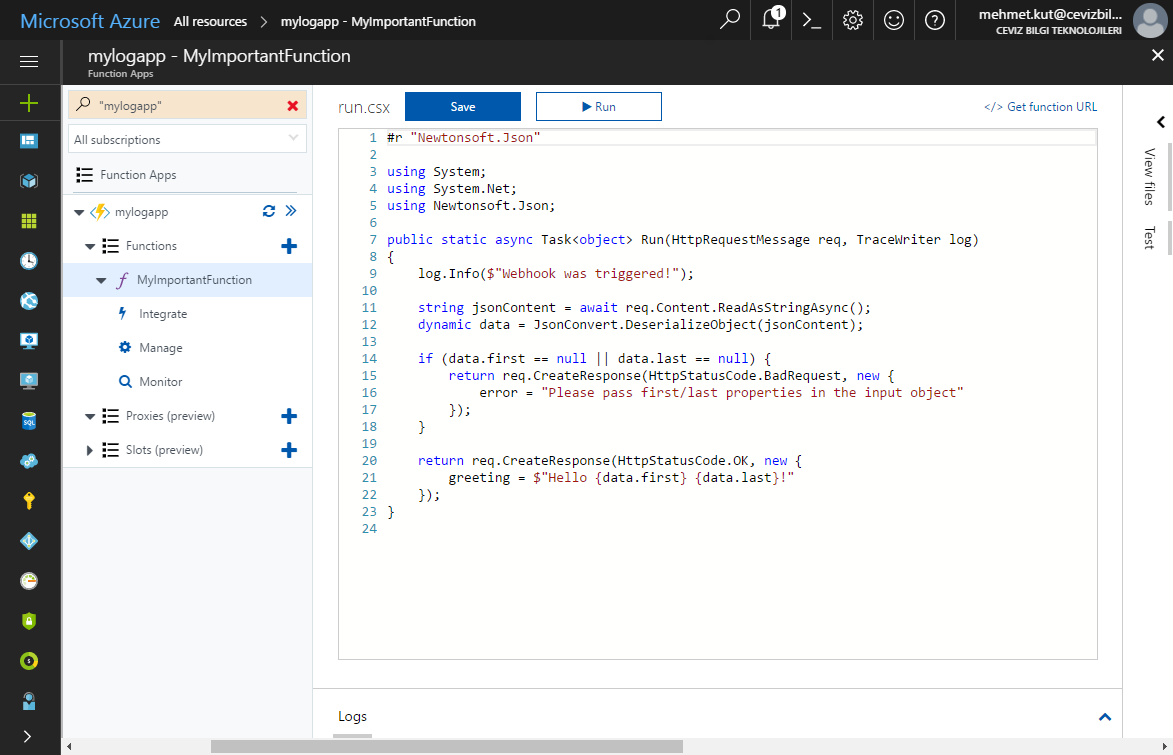
After we have our function, the code editor will look like the above.
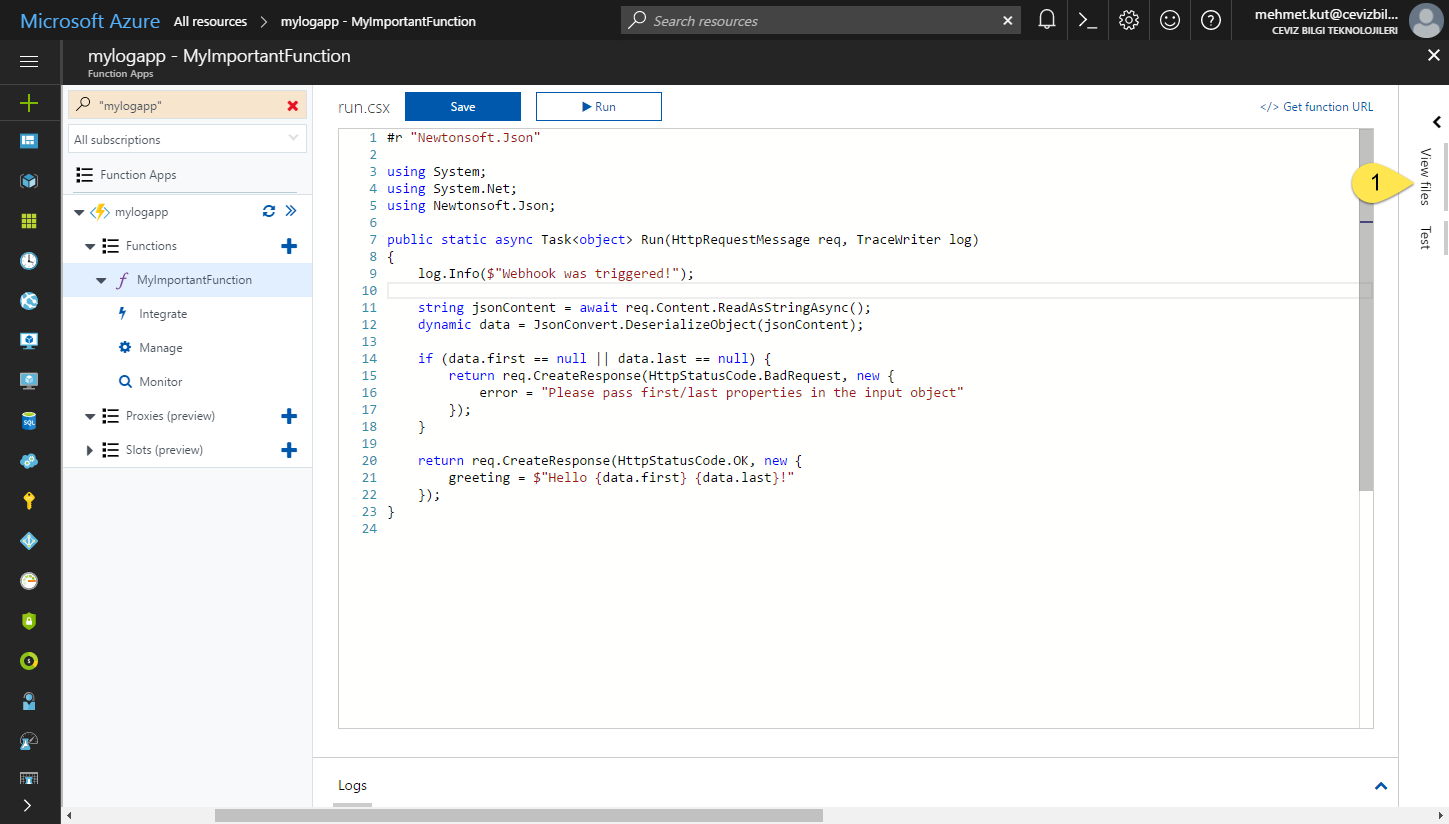
- Click on the View files panel to make it visible.
-
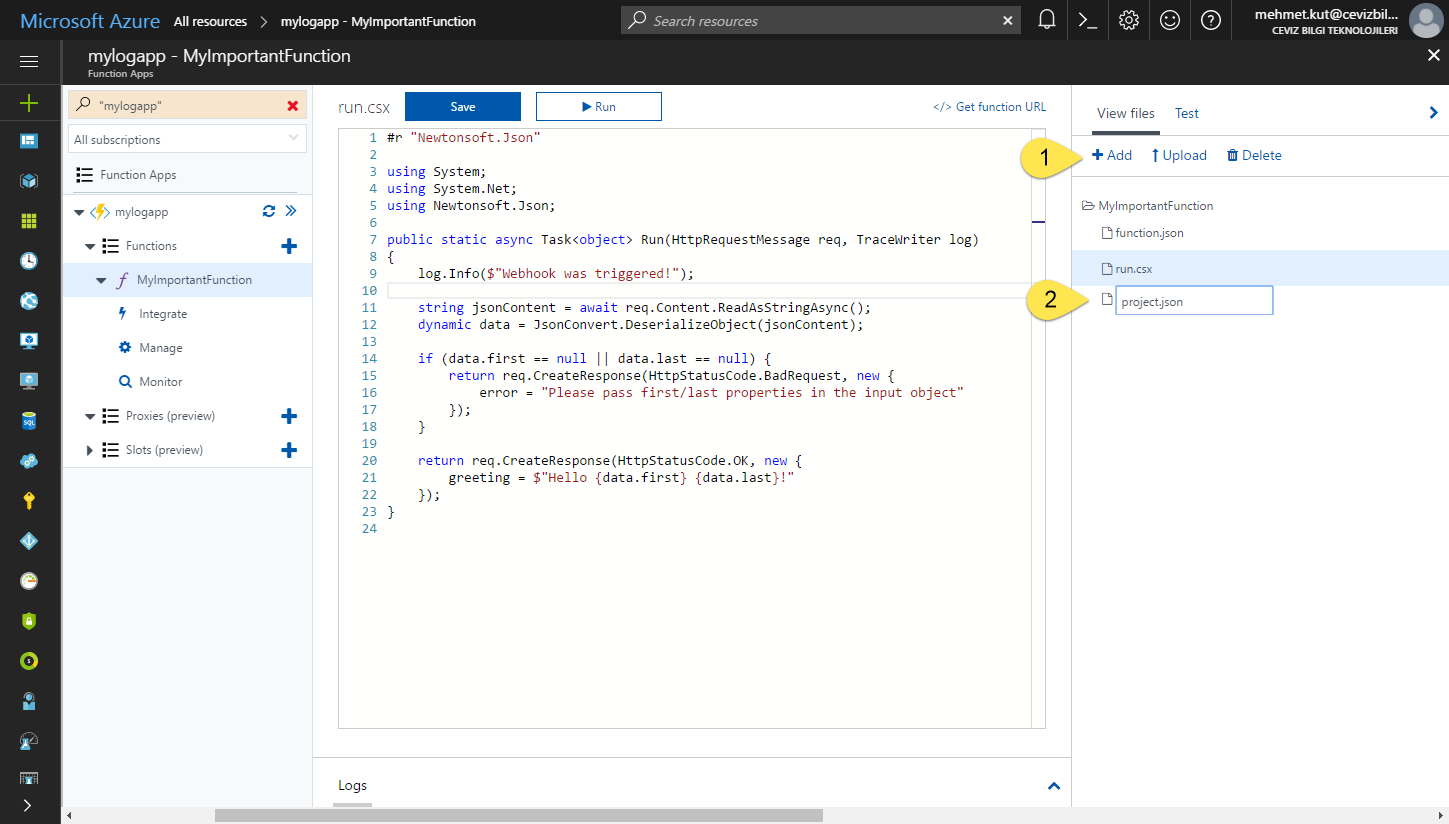
To use the required nuget packages, we click Add button in View files.
-
Create a file named project.json**.
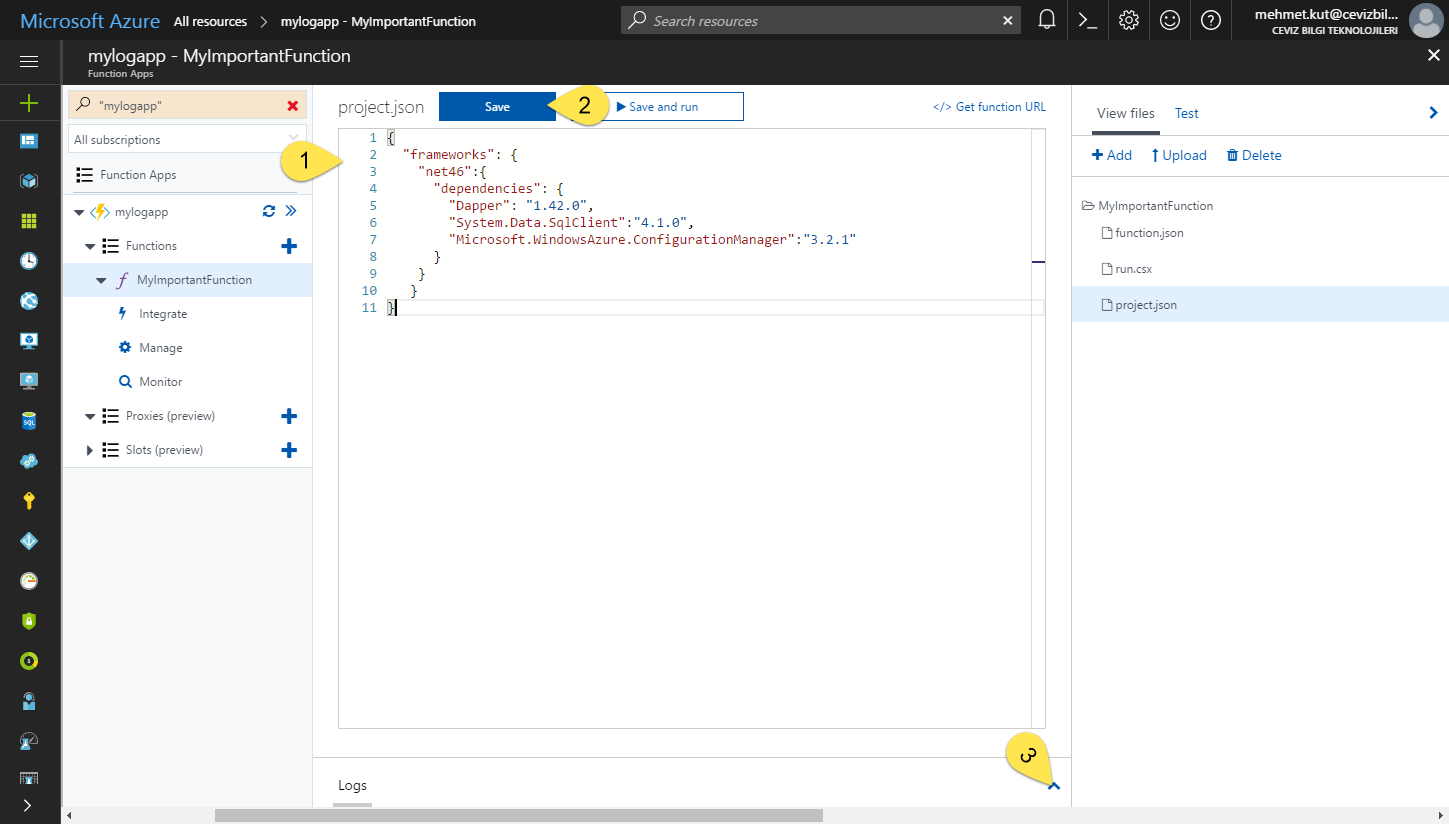
- project.json appears empty in editor.
{
  "frameworks": {
    "net46":{
      "dependencies": {
        "Dapper": "1.42.0",
        "System.Data.SqlClient":"4.1.0",
        "Microsoft.WindowsAzure.ConfigurationManager":"3.2.1"
      }
    }
   }
}
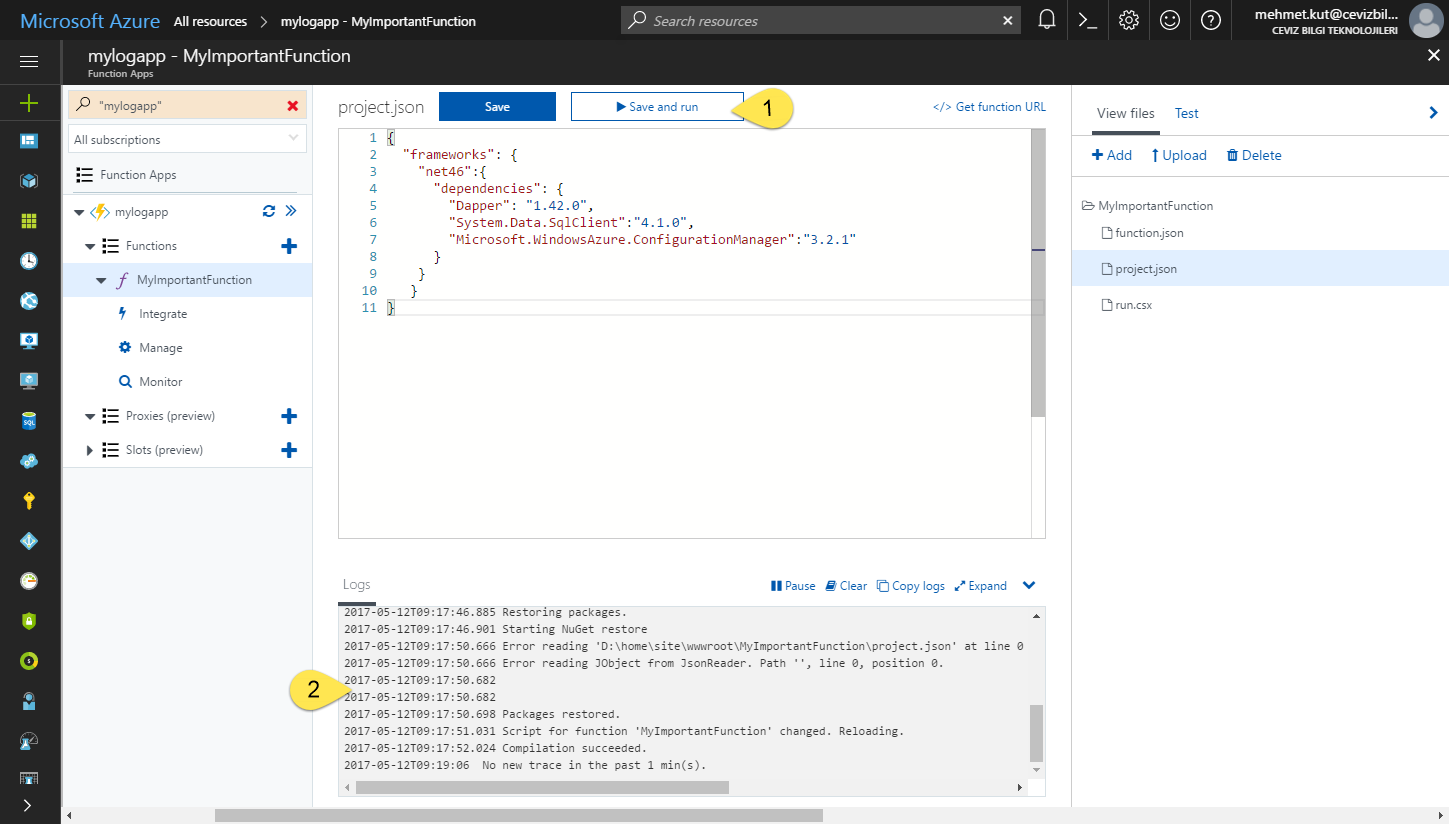
In project.json file, type the json above.
-
Click on Save button to save project.json.
-
We click on the up arrow icon to the right of Logs. So we can see what’s happening when we run the code.
-
Click on Save and run button to run our code.
-
You can see that the nuget packages in Logs section.
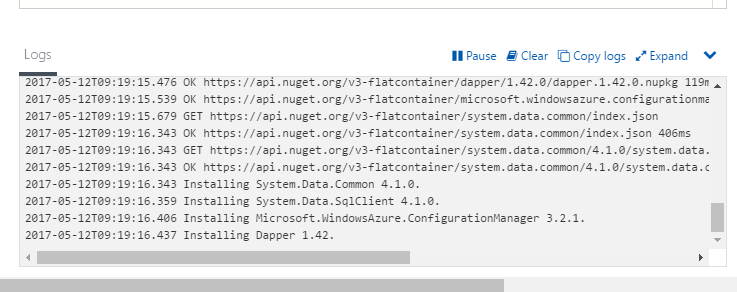
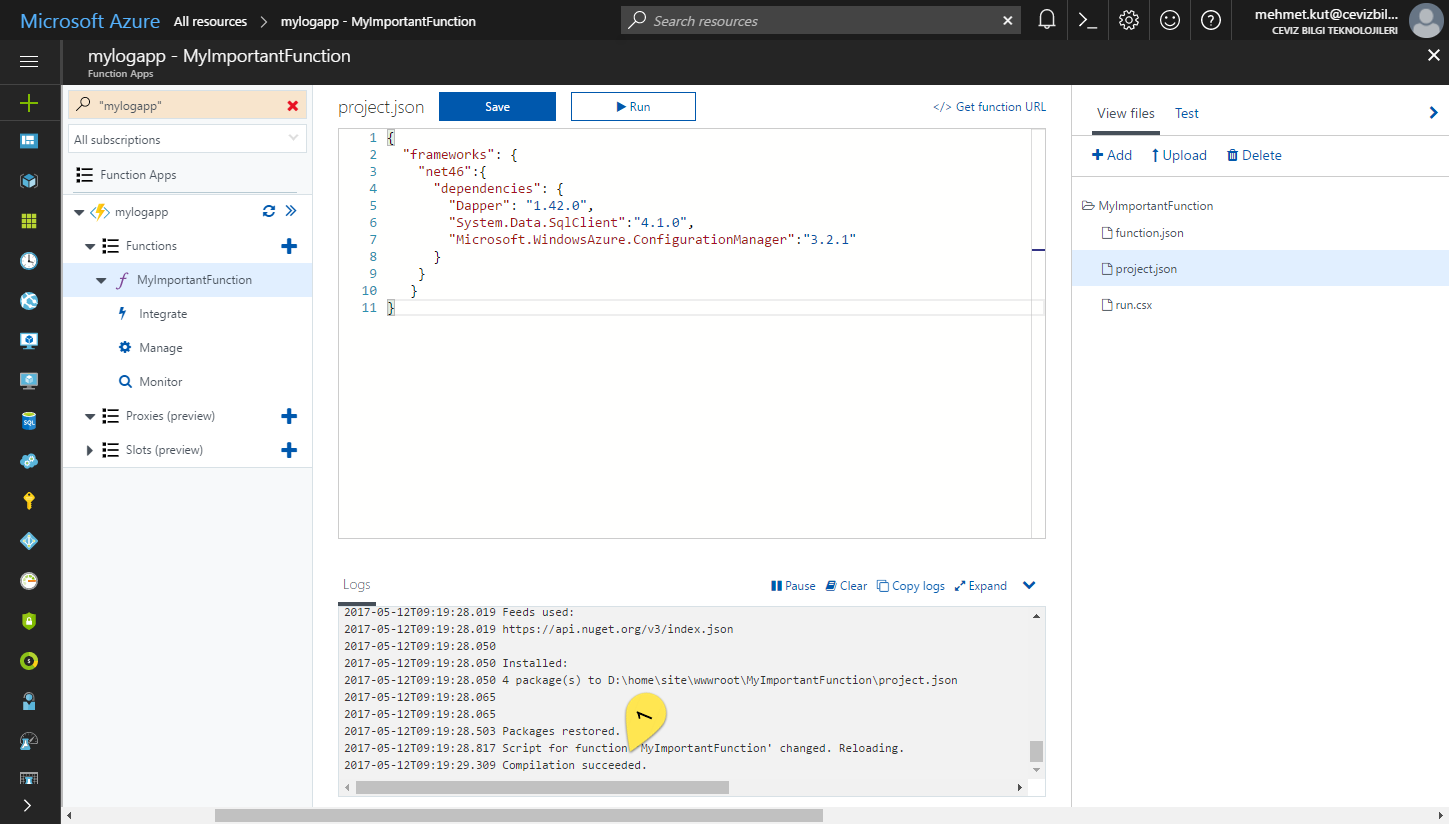
- When we see Packages restored. and Compilation succeeded in Logs section, we have installed the nuget packages. 👍
Now, we need the connection string information to connect to the database we have created.

-
Click on SQL databases.
-
Select LogDB.
-
Select Overview.
-
On this blade, click on Show database connection strings link.
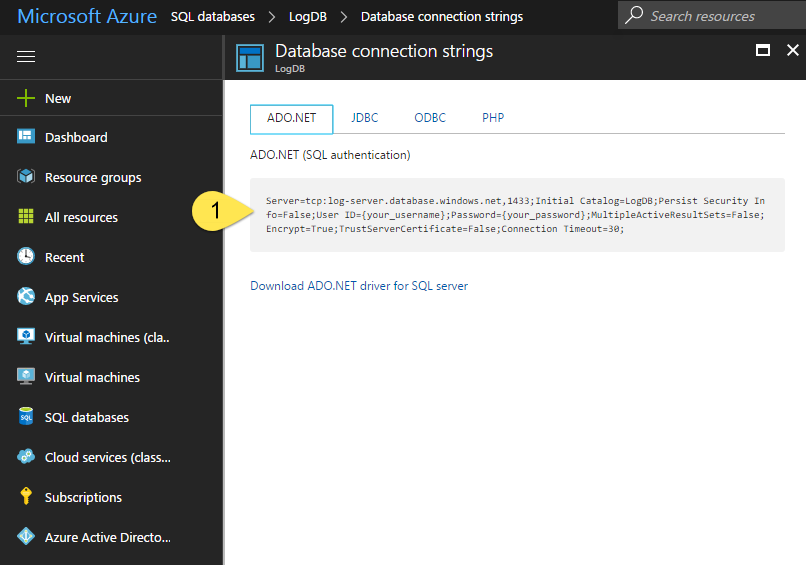
- We copy the connection string information on ADO.NET tab to notepad.
Server=tcp:log-server.database.windows.net,1433;Initial Catalog=LogDB;Persist Security Info=False;User ID=logserveradmin;Password=LogServer1234;MultipleActiveResultSets=False;Encrypt=True;TrustServerCertificate=False;Connection Timeout=30;
Your connection string information will be similar to the above. Replace {your_username} and {your_password} with your username and password, your connection string information will be ready.
We should have to define our connection string to use in our function.
-
Click on All Resources from left menu.
-
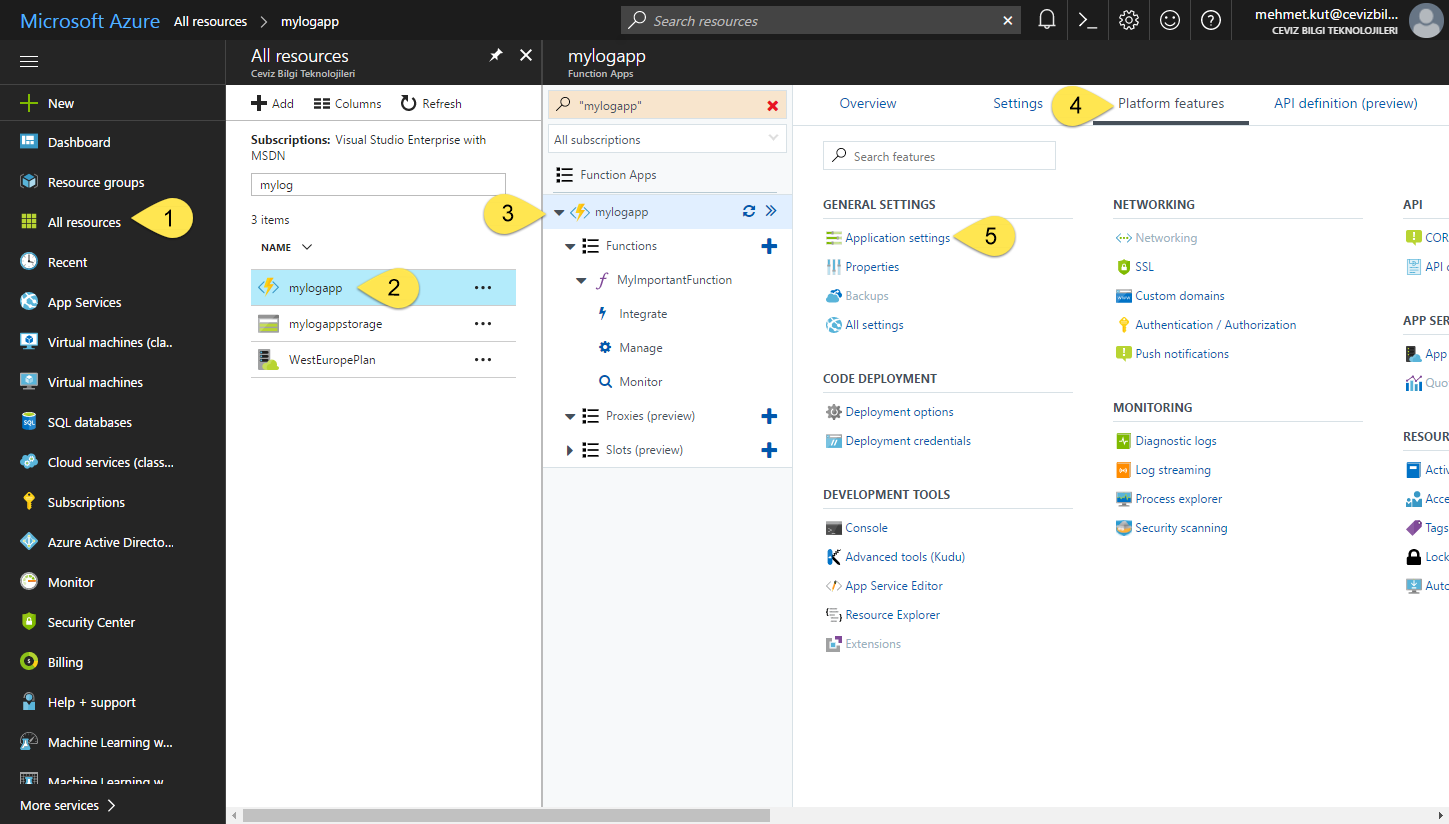
Find the Function App we are working on and click on it.
-
Select Function App
-
Click on Platform fetures tab.
-
Select Application settings item.
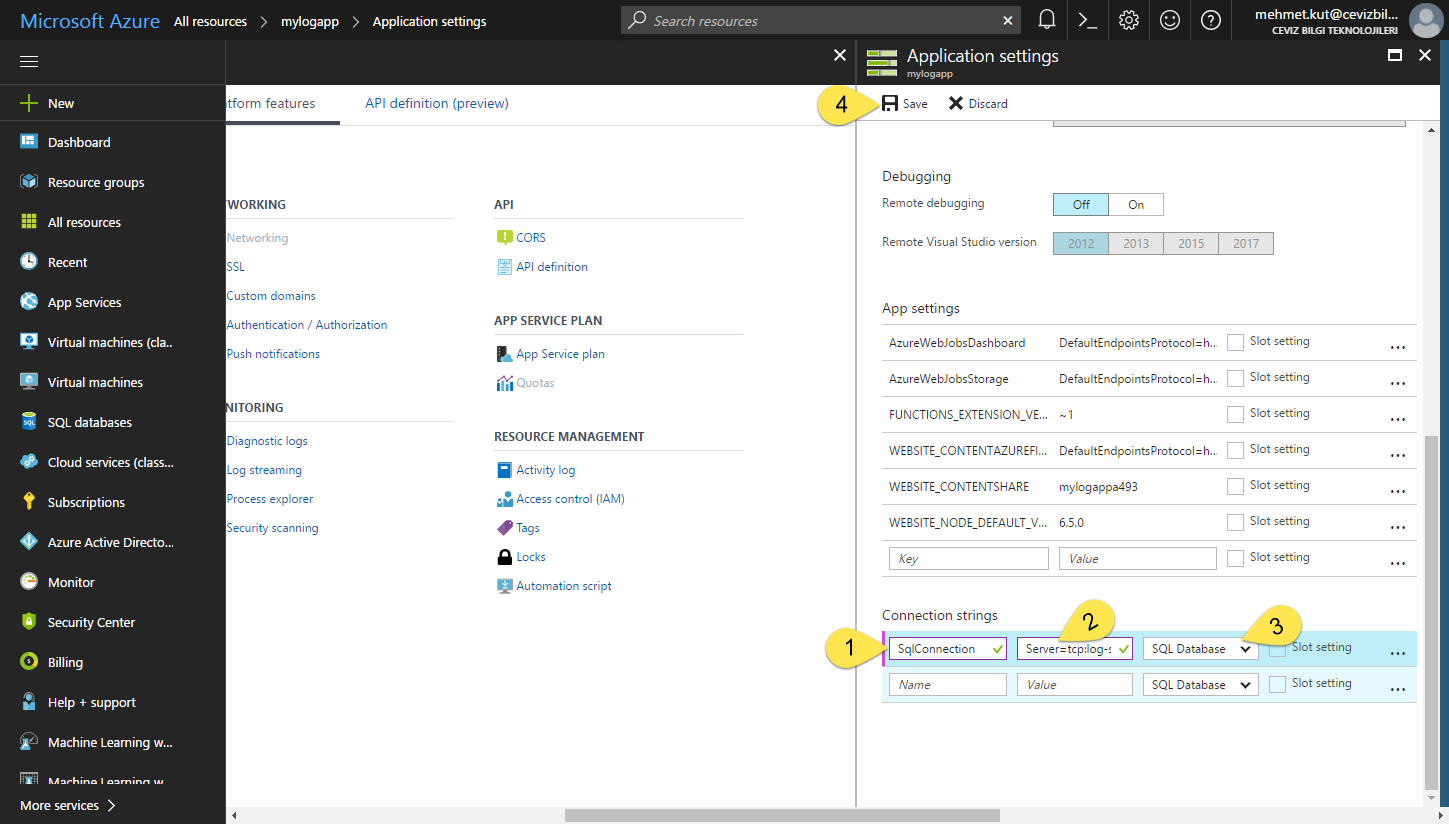
-
In Name field type, SqlConnection
-
Paste connection string text to Value field from Notepad.
-
Choose database as SQL Database.
-
Click on Save button.
Open editor to write code.
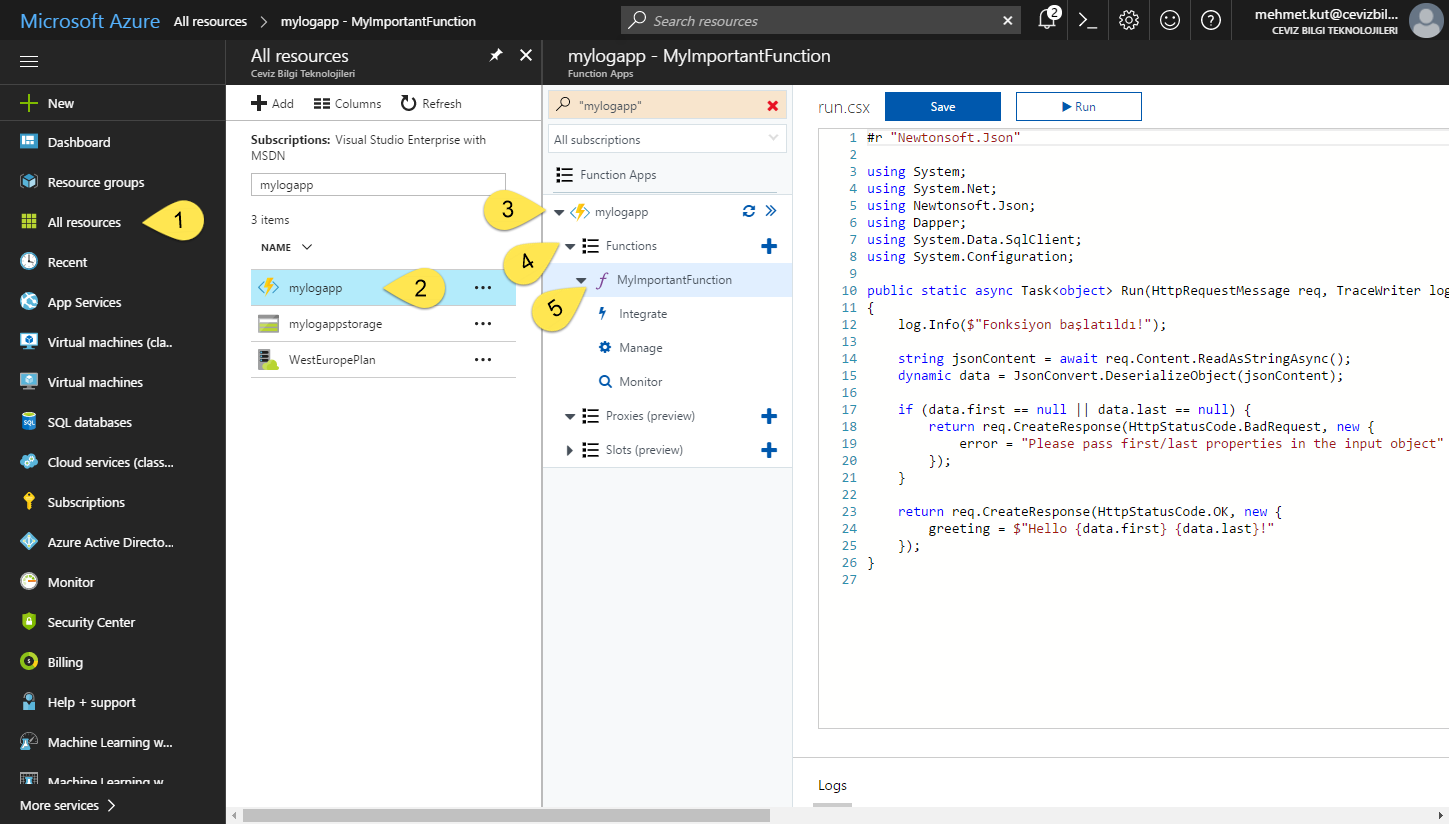
-
From left menu select All resources
-
Find the Function App we are working on and click on it.
-
Select Function App
-
Click on Functions
-
Finally Click on MyImportantFunction and open the code editor.
Expand View files section.
- Finally write our code!
#r "Newtonsoft.Json"

using System;
using System.Net;
using Newtonsoft.Json;
using Dapper;
using System.Data.SqlClient;
using System.Configuration;

public static async Task<object> Run(HttpRequestMessage req, TraceWriter log)
{
    log.Info($"Fonksiyon başlatıldı! RequestUri={req.RequestUri}");

    //Very important tasks here :)
    //.....
    //.....

    //We retrieve the userName field, which comes as a parameter to the function, by deserializing req.Content.
    string jsonContent = await req.Content.ReadAsStringAsync();
    dynamic data = JsonConvert.DeserializeObject(jsonContent);

    //If there is no username, we return the error message.
    if (data.userName == null) {
        return req.CreateResponse(HttpStatusCode.BadRequest, new {
            error = "Lütfen fonksiyonu çağıran kullanıcı adını giriniz."
        });
    }

    //Azure SQLDB Log
    var logAdded = true;
    try
    {

        //We get the Connection String in the Function App Settings section we defined.
        var connectionString  = ConfigurationManager.ConnectionStrings["SqlConnection"].ConnectionString;


        using(var connection = new SqlConnection(connectionString))
        {
            //Opens Azure SQL DB connection.
            connection.Open();

            var logMessage = $"Fonksiyon {data.userName} tarafından {DateTime.UtcNow} tarihinde çağırılmıştır.";

            // Insert Log to database.
            connection.Execute("INSERT INTO [dbo].[Logs] ([LogMessage], [CreateDate]) VALUES (@logMessage, @createDate)", new { logMessage, createDate =  DateTime.UtcNow} );
            log.Info("Log kaydı başarılı şekilde veritabanına eklenmiştir!");
        }
    }
    catch
    {
        logAdded = false;
    }

   // We complete our function. According to its success status, it will display the message.
   return !logAdded
        ? req.CreateResponse(HttpStatusCode.BadRequest, "Something went wrong!")
        : req.CreateResponse(HttpStatusCode.OK, "Azure Function worked successfully and this is sooo cooool!");
}
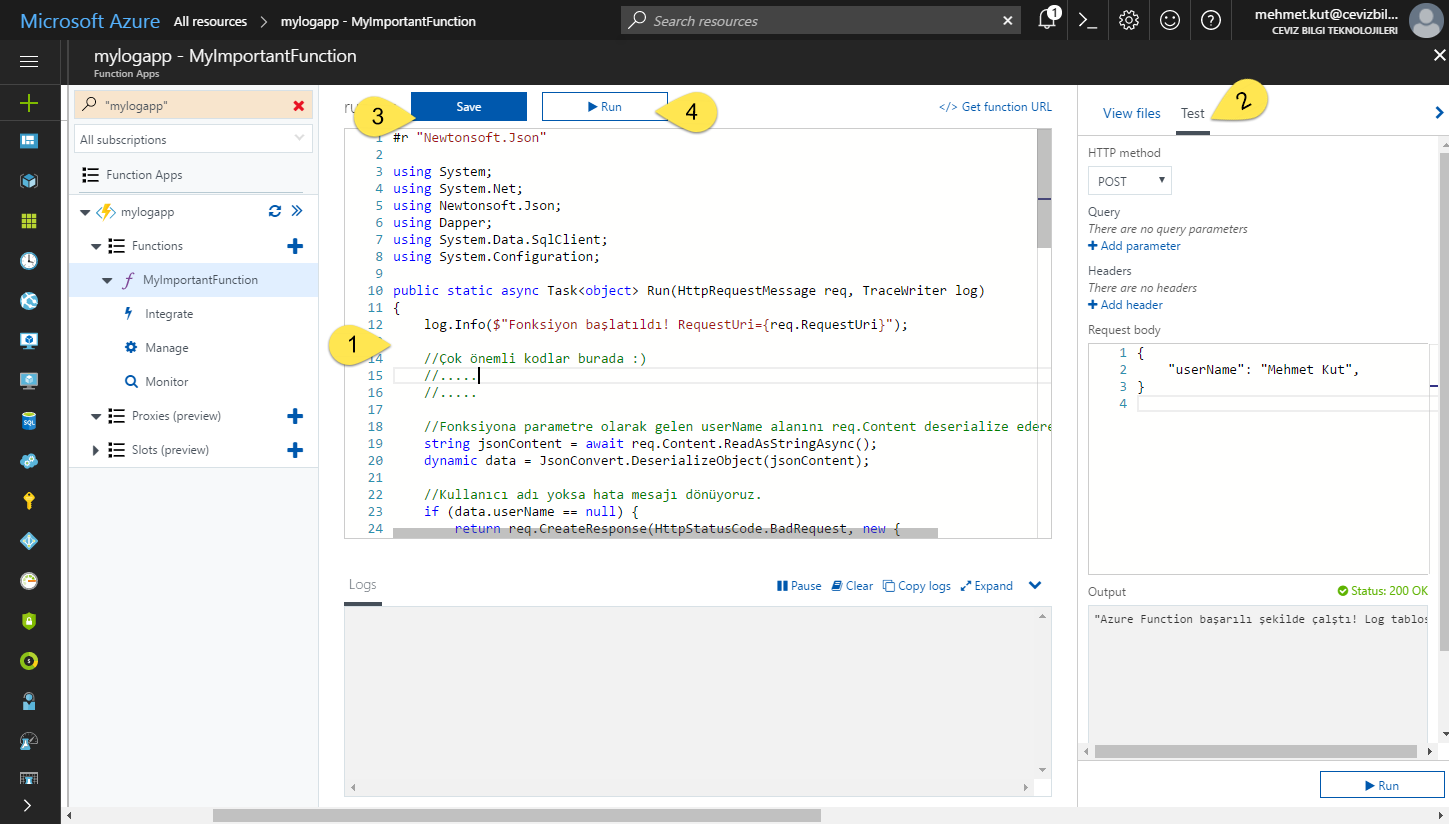
- We need to give the username as a parameter to our function. Click on the Test tab and define Request body as JSON.
{
    "userName": "Mehmet Kut"
}
- Click on the Save button to save function.
Do not forget to make visible Logs tab to see result.
- Click on Run button and run our code!
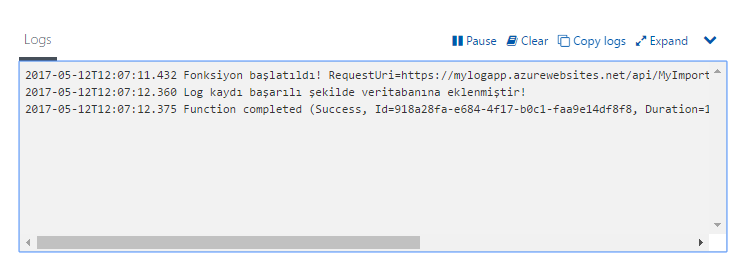
If there is no error after the code run is finished, Logs will have similar results as above.
Kodumuz başarılı şekilde çağırıldı peki tablomuza kayıtlar yansıdımı kontrol edelim.
Let’s check that our code was successfully runned. Check our table.
-
From left menu select SQL databases
-
Select Log database.
-
Click on Overview item.
-
Click on Tools button.
-
Select the Query editor
-
Click on the Login button. Ekranda giriş işlemleri yabileceğimiz bir kısım açılacak.
-
Choose SQL server authentication as Authorization type.
-
Login type the username that we defined while creating the SQL server.
-
Password type the password that we defined while creating the SQL server.
-
Click on OK, button and connect to server.
- Write our query to code ediyor.
SELECT * FROM Logs
-
Click on Run button.
-
Go to Result tab. As you see our records appeared.👍
Conclusion
Congratulations if you follow the article step by step. Now you know the answers to the following questions. 😄
-
How to configure Azure SQL server via Azure Portal?
-
How to add a database to Azure SQL server and how to insert a table in this database?
-
How to query a table in Azure SQL database?
-
How do I create an Azure Function App?
-
How to use NuGet packages in Azure Function?
-
How to make Azure SQL DB connection within Azure Function?
-
How to add record to Azure SQL DB using Azure Functions?
One last note, probably you already notice we only used our browser.
Azure Portal is on its way to becoming a more powerful tool day by day. 👍